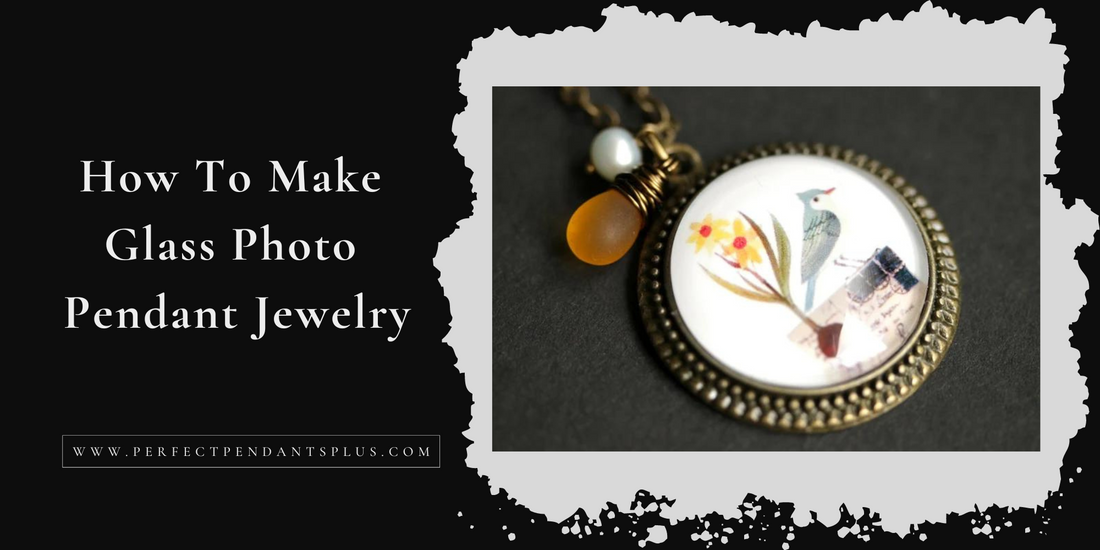
How To Make A Glass Photo Pendant Jewelry.
Have you ever wanted to know how to make a glass photo pendant? Well, you’re about to learn how.
I have been making glass photo jewelry for over 12 years. I feel like I could do it in my sleep. I want to share tips and tricks I found helpful over the years. Hopefully I can prevent you from making the same mistakes when I first started making glass photo charms.
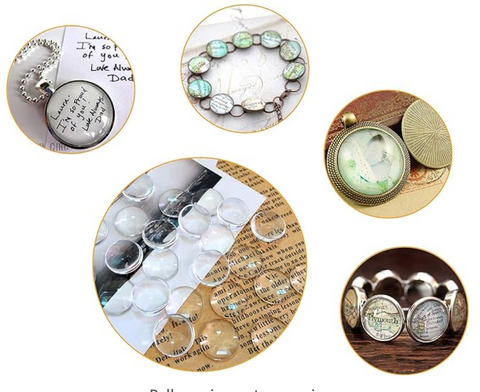
Here at Perfect Pendants Plus we offer everything you need to make your glass photo pendant jewelry. Including Pendant tray blank settings, glass cabochons, chains, and adhesive. We also ship super fast, too.
Here is the list of what you need to get started.
1. Clear Glass Tiles ( also called Cabochons)
2. Diamond Glaze ( the perfect clear glue)
3. Photos, printed artwork, scrapbook paper, or a printed picture
4. Pendant Tray Blanks (the base settings)
5. Necklace chain, key rings or bracelet
6. Scissors
7.Micro Glaze is necessary when using an ink jet printer to prevent ink bleeding on printed images.
8.Nail File
What we will be doing is attaching a picture to a clear glass tile and then attaching that to a pendant tray. The necklace chain goes through a loop in the pendant tray which will complete our piece of jewelry. Learn how to make a glass tile pendant easily with this tutorial. It will save you time, frustration, and money.
~First, select your picture that you would like to see on your glass photo pendant.
If you choose to print your pictures yourself, always use matte photo paper or card stock paper 65# thickness or higher. Cardstock paper is thicker than regular printer paper and works much better since it will not curl as easy when the glue touches it.
Additionally, it won't get cloudy during the process. You will also need to apply a think layer of Micro Glaze (click here for instructions) to prevent bleeding.
~ Clean the pendant tray and glass to make sure there isn't any dirt or fingerprints.
~ Open the Diamond Glaze and put a drop on the flat side side of my glass cabochon. I cover one side of the pendant glass completely with the Diamond Glaze.
To have too much glue on your glass is better than not having enough. You can always clean off excess glue, but if you don't have enough on there, then there's no way to add more later.
~Pick up the glass, turn it over and then press it down on my picture. The glue will now be in contact with the picture and the glass tile. This allows me to look through the glass and adjust it over my picture, ensuring that my pendant look perfect when worn.
~ Do not press down on the glass, I simply let it float and I only press down gently if I need to move the glaze out to the edges more. Once adjusted, I let the glass sit for a couple of hours while the glaze dries.
~ Once the Diamond glaze is dry trim the excess paper from around the sides of the glass cabochon with a pair of scissors.
~ If needed use a nail file to smooth the glass edges and ensure the paper doesn't hang over the edge of the glass cabochon.
~ Add another thin layer of Diamond glaze on the back of the decorated glass cabochon you made. This will seal it. After covering the paper with glaze, let it dry for about an hour.
~ Put a few drop of Diamond Glaze in the pendant tray blank and then press the decorated glass into the pendant setting. It only takes a small amount.A
Just slide the finished photo pendant on a necklace, key chain, or charm bracelet and your new jewelry is ready to wear.
I hope that this little tutorial on how to make a glass photo pendants has helped you. These are truly fun and addictive to make and even more fun to wear or gift.
TIP: If you aren't happy with your finished piece, soak the glass and start over.